

We already know Django build-in system is pretty good for developers. Django forms have the developer-friendly build-in feature, Django provides several forms of rendering build-in methods. what was I discuss in the last post of how to create Django form. It’s just plain HTML form, no CSS, no javascript. and you can’t expect user-friendly UI without CSS and can’t expect a server-side well validate form without javascript. So Django is great for simple UI form, but I am talking about a beautiful user-friend, more controlled, form fields rendering Django template form.
. So in this article, I will show a Django form in which every field renders manually in the template.
Build a Django form scenarios
Create a django product form
Create forms.py file in product directory, and define ProductForm with four fields.
Note: STATUS used for status form status choices data.
from django import forms

class ProductForm(forms.Form):
    STATUS = (
        ('published', "Published"),
        ('pending', 'Pending'),
        ('rejected', 'Rejected'),
    )
    name = forms.CharField(max_length=250, help_text="Name max length 250, as helper text")
    description = forms.CharField(widget=forms.Textarea())
    status = forms.ChoiceField(choices=STATUS)
    is_active = forms.BooleanField()
Create a Django view for render form
In the meanwhile, create a product_form view which renders ProductForm,
from django.shortcuts import render, redirect, reverse
from .forms import ProductForm

def product_form(request):
    form = ProductForm(request.POST or None)
    if request.method == 'POST':
        if form.is_valid():
            instance = form.save(false)
            # do more action with data
            # return redirect success view
    context = {
        'form': form
    }
    return render(request, 'product/product_form.html', context)
After Creating the product_form view, don’t forget to map the URL,
from django.urls import path
from .views import product_form

urlpatterns = [
    path('form', product_form, name="product_form")
]
Bravo, we are successfully set up the Django form view. now we need one more requirement template file
Create template view and render form
In the product directory, create a product/product_form.html file, which renders Django form render in UI. Keep in mind I link bootstrap link in the head for beautiful UI.
<!doctype html>
<html lang="en">
    <head>
        <meta charset="UTF-8">
        <meta name="viewport" content="width=device-width, user-scalable=no, initial-scale=1.0, maximum-scale=1.0, minimum-scale=1.0">
        <meta http-equiv="X-UA-Compatible" content="ie=edge">
        <title>Product Form  | tech Incent</title>
        <link href="https://cdn.jsdelivr.net/npm/[email protected]/dist/css/bootstrap.min.css" rel="stylesheet" integrity="sha384-EVSTQN3/azprG1Anm3QDgpJLIm9Nao0Yz1ztcQTwFspd3yD65VohhpuuCOmLASjC" crossorigin="anonymous">
        <style>
            .container {
              width: 100%;
              max-width: 768px;
              margin-left: auto;
              margin-right: auto;
          }
        </style>
    </head>
    <body>
        <div class="container">
            <h2>Product Form</h2>
            <form action="{% url 'product_form' %}" method="post">
                {% csrf_token %}
                {{ form.as_p }}
                <button type="submit">Submit</button>
            </form>
        </div>
    </body>
</html>
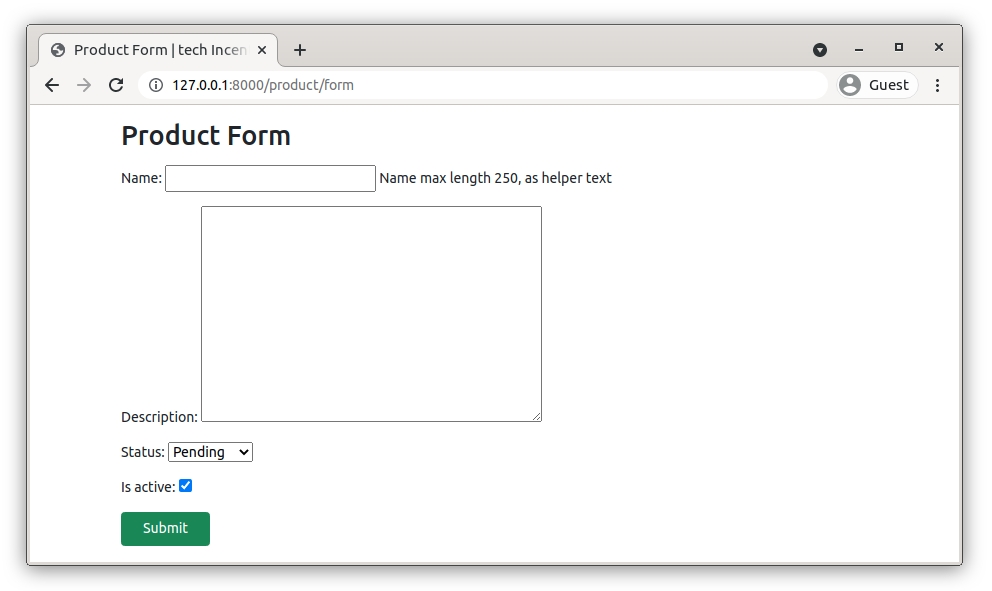
Now you can see, this is not a pretty good UI and also not a controlled Form.
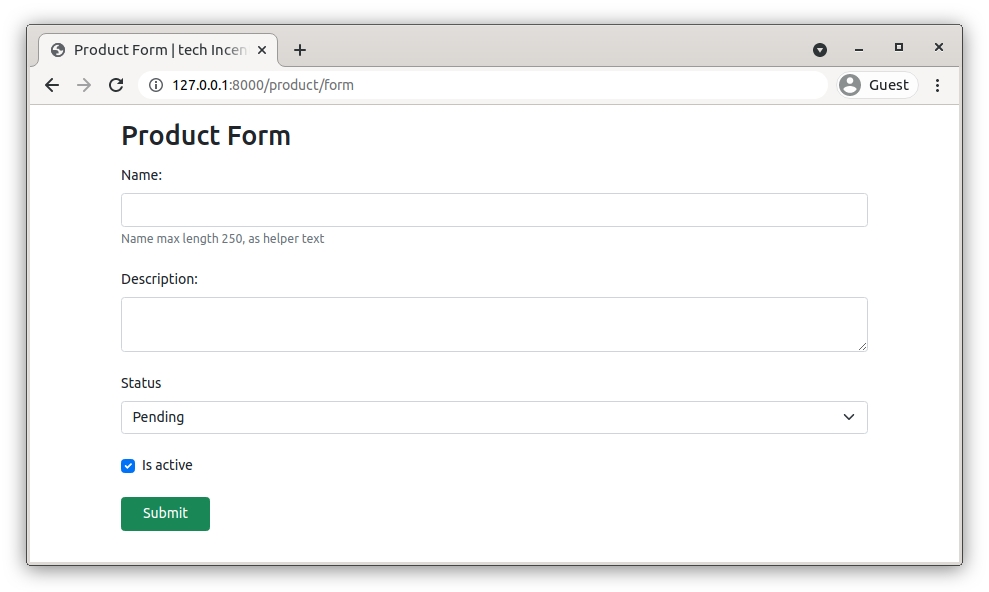
Let’s render form manually
<form action="{% url 'product_form' %}" method="post" novalidate>
                {% csrf_token %}
                <div class="mb-4">
                    <label for="{{ form.name.id_for_label }}" class="form-label">{{ form.name.label }}: </label>
                    <input name="{{ form.name.html_name }}" type="text" class="form-control" id="{{ form.name.id_for_label }}" required>
                    {% if form.name.help_text %}
                    <div class="form-text">{{ form.name.help_text }}</div>
                    {% endif %}
                    {% for error in form.name.errors %}
                    <div class="invalid-feedback d-block text-end">{{ error }}</div>
                    {% endfor %}
                </div>
                <div class="mb-4">
                    <label for="{{ form.description.id_for_label }}" class="form-label">{{ form.description.label }}: </label>
                    <textarea name="{{ form.description.html_name }}" class="form-control" id="{{ form.description.id_for_label }}"></textarea>
                </div>
                <div class="mb-4">
                      <label class="form-label" for="{{ form.status.id_for_label }}">
                          {{form.status.label}}
                      </label>
                    <select name="{{ form.status.html_name }}" value="{{ form.status.value }}" id="{{ form.status.id_for_label }}" class="form-select" >
                        {% for widget in form.status.subwidgets %}
                            {{ widget }}
                        {% endfor %}
                    </select>

                </div>
                <div class="mb-4">
                    <div class="form-check">
                      <input name="{{ form.is_active.name }}" checked="{{ form.is_active.value }}" id="{{ form.is_active.id_for_label }}" class="form-check-input" type="checkbox">
                      <label class="form-check-label" for="{{ form.is_active.id_for_label }}">
                          {{form.is_active.label}}
                      </label>
                    </div>
                </div>
                <button class="btn btn-success px-4" type="submit">Submit</button>
            </form>
Description of all {{ field }} attributes

- {{ field.label }}
Label attribute renders field label, e.g. Name, Description. - {{ field.label_tag }}
label_tag attribute renders a whole appropriate label HTML tag with form’s label_suffix. default label_suffix is a colon: Exapmle:
<label for=”id_name”>Name:</label> - {{ field.id_for_label }}
The ID that will be used for this field (id_name, id_description in the example above). If you are constructing the label manually, you may want to use this in place of label_tag. It’s also useful, for example, if you have some inline JavaScript and want to avoid hardcoding the field’s ID. - {{ field.value }}
The value of the field. e.g if status field default value: pending. - {{ field.html_name }}
The name of the field that will be used in the input element’s name field. This takes the form prefix into account if it has been set. Example: Name - {{ field.help_text }}
Any help text that has been associated with the field. - {{ field.errors }}
Outputs a <ul class=”errorlist”> containing any validation errors corresponding to this field. You can customize the presentation of the errors with a {% for error in field.errors %} loop. In this case, each object in the loop is a string containing the error message. - {{ field.is_hidden }}
This attribute is True if the form field is a hidden field and False otherwise. It’s not particularly useful as a template variable, but could be useful in conditional tests such as:{% if field.is_hidden %} {# Do something special #} {% endif %} - {{ field.field }}
The Field instance from the form class that this BoundField wraps. You can use it to access Field attributes, e.g. {{ name.field.max_length }} - {{ field.as_text }}
This will render HTML input tag, example: <input id=”id_description” name=”description” /> - {{ field.as_textarea }}
this will render HTML textarea tag, example:
<textarea name=”name” cols=”40″ rows=”10″ required id=”id_name></textarea> - {{ field.subwidgets }}
Above form example, you saw status CharField as a choice field that has choices data. In subwidgets attribute provide help to render a list of Option HTML tag. Example: <option value=”published”>Published</option>, <option value=”pending”>Pending</option>